Looking to set up call forwarding on your Android device? It’s a breeze! Just follow these simple steps:
1. Find and tap on the “Phone” app icon on your Android device. It usually looks like a classic phone icon and can be located on your home screen or within the app drawer.
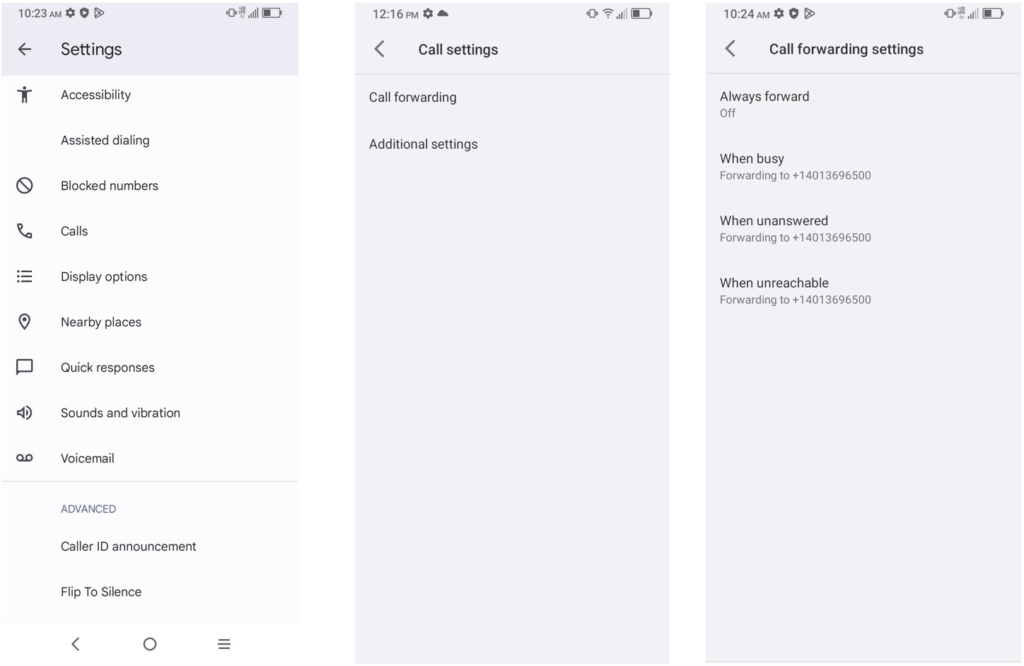
2. Depending on your device and Android version, there are a few ways to get to phone settings:
– Look for three dots, a gear icon or an ellipsis icon in the upper-right corner of the “Phone” app. Tap it and select Settings.
– Some devices may have a “Settings” option within the “Phone” app, often depicted as a gear icon.
3. Once you’re in the Phone settings, search for an option related to “Call” settings, “Calling” accounts, or “Advanced” settings. The exact wording may differ, but the focus should be on call-related settings.
4. Within the call settings section, you should come across an option labeled “Call Forwarding” or something similar.
5. Toggle the switch or select the option to activate call forwarding.
6. After enabling call forwarding, you’ll be asked to input the phone number to which you want calls forwarded. Ensure that you include the complete forwarding number, which should encompass the area code and any necessary prefixes.
7. Once you’ve entered the forwarding number, save your settings. Voila! Your calls will now be forwarded to the designated number.
The precise steps and terminology might vary slightly based on your device’s manufacturer and Android version. If you encounter any hiccups, you can refer to your device’s user manual or get in touch with our friendly Customer Support team. They’re here to assist you from Monday to Friday, 10:00am to 08:00pm EST at (272) 777-1104 . You can also chat with us on our website.


